Hey Guys,
Wish you all a happy and wonderful new year.Also i would like to express my gratitude to my friends for being supportive in all my ventures.You guys rock! Thanks a lot.Also 2009 will be a big year for paperbird.Lot of plans,coming on to light.See you all in 2009.Enjoy!
regards,
mahesh
Wednesday, December 31, 2008
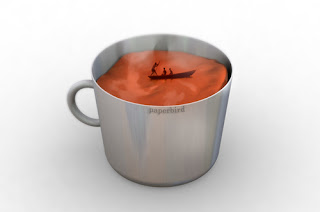
3D Art: Hot Chocolate
Hey guys,
A new 3d max render and a fine tip to make one good cup of Hot Chocolate.Enjoy!
Download the hi res wallpaper here:
http://www.4shared.com/file/78317771/73fa1678/cup.html
Thursday, December 25, 2008
Tutorial: 3D Max+Photoshop: [Z]Depth of Field
A tip to all my 3D Max buddies.While working on a 3D shot,our first priority is to make it look as much real as possible.You could spend minions oh hours inside the 3dpackage itself or could be smart and save some valuable time.If you really want DOF [depth of field] effect for a 3d scene and if you are only aware of using the tragically slow post-prod effects in max, this might be useful for you. Note,this tip is applicable to both still and video.
1.After lighting up your scene and rendering it out.Do another render,this time with a few changes.Go to render settings>render elements and add a ZDepth element.Render the scene out.You will get a greyshaded version of the scene.That is the depth map of the shot.
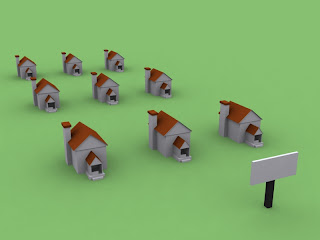
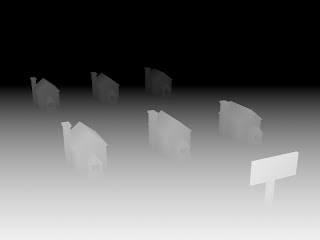
2.Now if you want to apply this to one shot.Open up photoshop.open the original render.Go the the channels tab and add a new layer.Now open the depth map.Copy it then paste it to the new layer in the channels tab of the original render.Turn off the visibility of the new alpha 1 layer.
3.Now switch back to the layers tab.Select the image layer and apply a lens blur to it.In the settings,pick the Alpha 1 layer.Now you have the depth data in that layer applied to ur original render. You can tweak the value slider to get the desired effect.
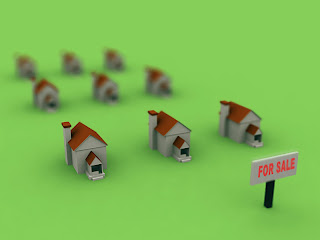
PS: if you want this effect on a video and u are using after effects, the steps are pretty much the same.I will be doing a video tutorial on that soon.Till then enjoy the Static version! ;)
1.After lighting up your scene and rendering it out.Do another render,this time with a few changes.Go to render settings>render elements and add a ZDepth element.Render the scene out.You will get a greyshaded version of the scene.That is the depth map of the shot.


2.Now if you want to apply this to one shot.Open up photoshop.open the original render.Go the the channels tab and add a new layer.Now open the depth map.Copy it then paste it to the new layer in the channels tab of the original render.Turn off the visibility of the new alpha 1 layer.
3.Now switch back to the layers tab.Select the image layer and apply a lens blur to it.In the settings,pick the Alpha 1 layer.Now you have the depth data in that layer applied to ur original render. You can tweak the value slider to get the desired effect.

PS: if you want this effect on a video and u are using after effects, the steps are pretty much the same.I will be doing a video tutorial on that soon.Till then enjoy the Static version! ;)
Tuesday, December 23, 2008
Mock Up: XBOX PORTABLE
Monday, December 15, 2008
Wallpaper: Christmas Time Paperbird

Hey guys,
A small gift to you all. Dont get ur hopes too high. [Face it! Anyway its a free blog] .A brand new christmas wallpaper for your desktop.Yeaaah....
Check it out
http://www.4shared.com/file/76051705/3d96b449/christmas-time.html
Sunday, December 14, 2008
3D Art: Cactus
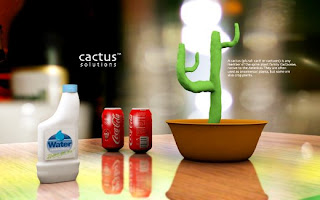
Hey guys,
A lot of things going around as Christmas is always the busiest of all times! Got a few minutes to spare today and i came up with this.A brilliant way to waste a couple of minutes.All you need is 3D Max, Photoshop and a really non-creative moment!
Will be back with new updates soon! Enjoy the holidays
Download HQ version of the image here:
http://www.4shared.com/file/75918913/591faf28/xcxcx_copy.html
Subscribe to:
Comments (Atom)


