Photo-montaging in photoshop can be a pain when you want to create a seamless and detailed composition. Here is an easy to follow tutorial which shows you how to use Adobe After effects to create photorealistic compositions, the no-frills way.
Take a look at the following example. I am trying to create an actual dynamic background to this rather dull original toy photograph.
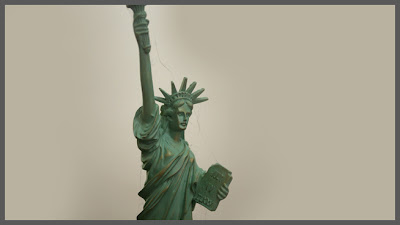
This is the final result we are gonna get after completing these easy steps in AE.

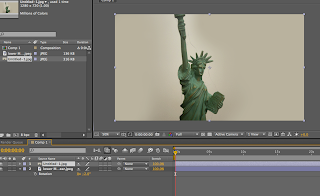
1. Open Adobe After effects and import the original image and the background plate to the project window. Go to Composition>Create a new composition and set the dimensions as needed. Now drag the background plate image on to the composition timeline below. Also drag the Original image to the composition timeline and above the background plate layer.
2. Now select the Original image layer. Go to Effects> Keying and select Keylight 1.0. Now select the Color Picker icon next to the screen color option in the keylight 1.0 window and pick the color you want to remove from the original image.
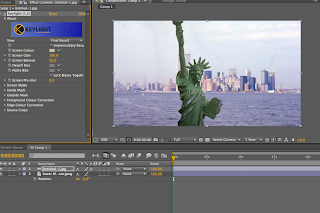
3. The image looks messy now. But dont worry, we are not finished yet. Reduce the screen grain option from the keylight window till the glitch go away. In this case, the image was fine at 50.
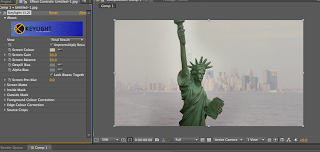
Here you will notice that the background image fades out as you bring down the screen grain. That sort of makes your life unintentionally easy as it makes our foreground sharper and clearer.
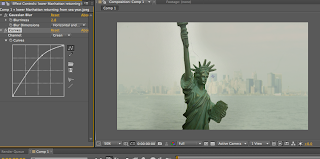
4. Now you can match your background plate to the subject's temperature. Select the background plate, go to Effects> Color Correction> Curves. Here, I am moving the green channel a bit up.
Thats it. An easy, hassle-free, photo-realistic background for your still life photography!


 4. If you are happy with the tracking, select Export Tracking Data
 5. Save it to AE . The tracking data is then saved as a Txt file.

 9. Now we will add some blur to match the image with the video. Select and Gaussian Blur the top portion of the screen.


