Tuesday, December 20, 2011
Monday, December 12, 2011
Thursday, December 1, 2011
Wednesday, November 30, 2011
Friday, November 25, 2011
Mocha Compositing Test: Backyard UFOs
3D Studio Max + Adobe Aftereffects+ Mocha + Adobe Photoshop + Final Cut Pro + Canon 5D Mark II
Thursday, November 24, 2011
Wednesday, November 23, 2011
Tuesday, November 22, 2011
Sunday, November 20, 2011
Motion Tracking Tutorial with Mocha
I was on a compositing job, when I "accidentally" bumped into and used the Mocha Matchmover which now comes in as a package with Adobe Aftereffects CS5. Mocha is a full featured stand-alone motion/camera tracker which uses a planar tracking method instead of the default point tracking in AE. Its tracks a region instead of a point and thus gives us a more accurate tracking data.
I am writing a simple tutorial which shows you how to import your tracking data on to AE from Mocha.
1. Open Mocha. Select New and import the footage you what to track.
2. Click the planar tracking tool from the top toolset and draw the region you want to track in the video.
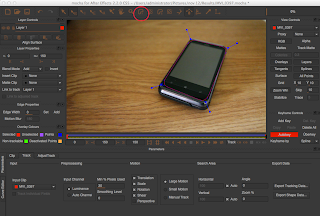
3. Go to > Track > Forward Tracking. After its done, you can also do a Backward Tracking to ensure accuracy.
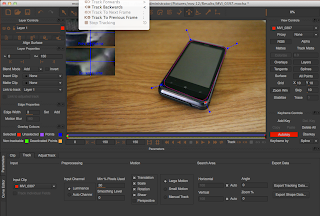 4. If you are happy with the tracking, select Export Tracking Data
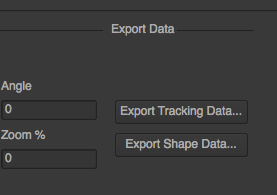 5. Save it to AE . The tracking data is then saved as a Txt file.
Now for this example, we want to add a screen to the phone. We will do it in Photoshop as its just a 2D shot.
6. Open Adobe AE. Import the footage. Save the first frame as a PSD File.
7. Open Photoshop. Open the PSD File. Drag and drop the image you want to add to the shot as the screen.
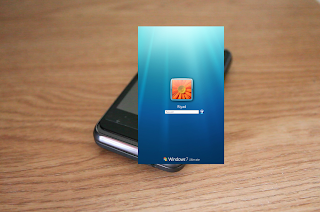
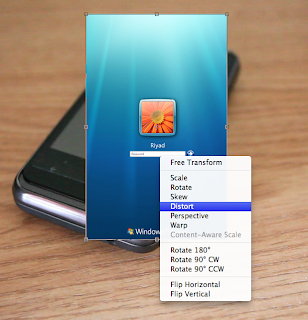
8. Use Distort to align the image in perspective to the screen.
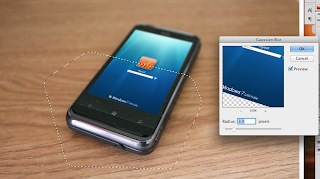
 9. Now we will add some blur to match the image with the video. Select and Gaussian Blur the top portion of the screen.
10. Save the PSD.
11. Open Adobe AE. Import the PSD file and put the screen layer on top of video.
12. Goto Layer> Create a New Null Object.
13. Now open the tracking data text file you've exported from Mocha in notepad and copy the content.
14. In AE, select the Null object and click Cntrl (Apple) + Paste to bring in the tracking data to the null object.

15. Parent the Screen layer to the null object.
That's it! You now have an artificial screen on your phone!
Friday, November 11, 2011
Tutorial: Easy composition with Adobe After effects for your Photos
Photo-montaging in photoshop can be a pain when you want to create a seamless and detailed composition. Here is an easy to follow tutorial which shows you how to use Adobe After effects to create photorealistic compositions, the no-frills way.
Take a look at the following example. I am trying to create an actual dynamic background to this rather dull original toy photograph.
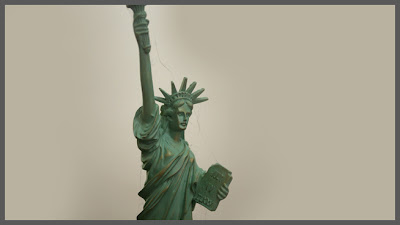
This is the final result we are gonna get after completing these easy steps in AE.

1. Open Adobe After effects and import the original image and the background plate to the project window. Go to Composition>Create a new composition and set the dimensions as needed. Now drag the background plate image on to the composition timeline below. Also drag the Original image to the composition timeline and above the background plate layer.
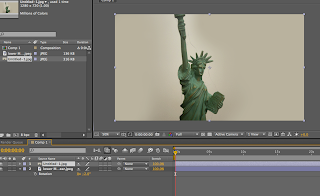
2. Now select the Original image layer. Go to Effects> Keying and select Keylight 1.0. Now select the Color Picker icon next to the screen color option in the keylight 1.0 window and pick the color you want to remove from the original image.
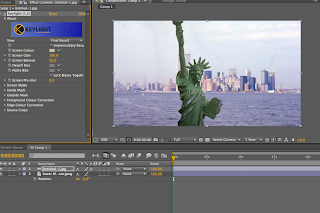
3. The image looks messy now. But dont worry, we are not finished yet. Reduce the screen grain option from the keylight window till the glitch go away. In this case, the image was fine at 50.
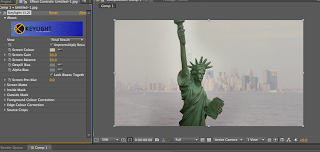
Here you will notice that the background image fades out as you bring down the screen grain. That sort of makes your life unintentionally easy as it makes our foreground sharper and clearer.
4. Now you can match your background plate to the subject's temperature. Select the background plate, go to Effects> Color Correction> Curves. Here, I am moving the green channel a bit up.
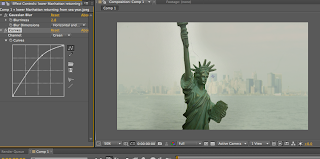
Thats it. An easy, hassle-free, photo-realistic background for your still life photography!
Monday, October 31, 2011
Sunday, October 23, 2011
Monday, September 26, 2011
Tutorial: Quick Sky Replacement using Photoshop

Here's an easy tutorial on doing a quick sky replacement using photoshop.
1. Load up your image in photoshop.
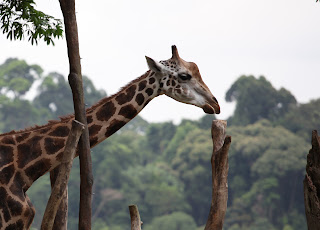 2. Now take in the sky image you want to add to your shot and place it above the original shot aligning it the way you want.
  3. Duplicate the Background layer and place it on top of the sky layer. Convert the layer to Black & White.
 4. Bring in the Level controls and use the sliders to create a matte out of that layer . Check the below image.
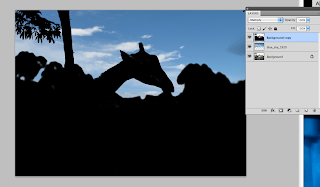 6. Now go to Edit> Copy Merged and Paste it. A new merged layer will be created on top. Turn off the visibility of the Sky Layer and the Matte Layer. Change the merged layer's blending mode to screen.
Thursday, September 1, 2011
Sunday, July 24, 2011
Friday, June 3, 2011
Thursday, June 2, 2011
Saturday, May 7, 2011
10 Must Play Free-Roam/ Open-World PS3 Games
1. Red Dead Redemption

http://www.youtube.com/watch?v=aOpKJ6hjPIM
2. Red Dead Redemption - Undead Nightmares

http://www.youtube.com/watch?v=dxfjuwd6WWI
3. Mafia 2

http://www.youtube.com/watch?v=bVkHraUDDpk
4. Assassins Creed - Brotherhood

http://www.youtube.com/watch?v=zzNs4-kRLaE
5. GTA 4

http://www.youtube.com/watch?v=HlF6fbIFiCM
6. Just Cause 2

http://www.youtube.com/watch?v=5kjs-SC70Wg
7. Infamous

http://www.youtube.com/watch?v=S-NBsSfxH30
8. The Saboteur

http://www.youtube.com/watch?v=l2gClnlzo4o
9. Prototype

http://www.youtube.com/watch?v=JvsUkUaJjYs
10. Saint's Row 2

http://www.youtube.com/watch?v=_g7F7Pq-lh0

http://www.youtube.com/watch?v=aOpKJ6hjPIM
2. Red Dead Redemption - Undead Nightmares

http://www.youtube.com/watch?v=dxfjuwd6WWI
3. Mafia 2

http://www.youtube.com/watch?v=bVkHraUDDpk
4. Assassins Creed - Brotherhood

http://www.youtube.com/watch?v=zzNs4-kRLaE
5. GTA 4

http://www.youtube.com/watch?v=HlF6fbIFiCM
6. Just Cause 2

http://www.youtube.com/watch?v=5kjs-SC70Wg
7. Infamous

http://www.youtube.com/watch?v=S-NBsSfxH30
8. The Saboteur

http://www.youtube.com/watch?v=l2gClnlzo4o
9. Prototype

http://www.youtube.com/watch?v=JvsUkUaJjYs
10. Saint's Row 2

http://www.youtube.com/watch?v=_g7F7Pq-lh0
Subscribe to:
Comments (Atom)


